


How to Paint a Tropical Sunset with Acrylic Paints
Hi Friends!
I’m continuing my series of classic acrylic painting tutorials reimagined as step-by-step painting blogs.
If you’d like to watch the original video that this colorful painting comes from, you can watch it here.
This is a great lesson for beginners or more advanced painters, as it’s pretty straightforward but you have a lot of room to explore and invent.

I live in a pretty cold, northern city right now (Seattle, Washington), but Andrea and I will be moving to Puerto Rico later this year.
My family background is Russian/Ukranian, but I can’t wait to leave behind the cold weather forever and enjoy the sand and surf!
This painting transports me to that magical feeling of a tropical sunset; and on a particularly hard work day, I like to picture myself chilling in the hammock with a good book or my guitar.
Here’s what you’ll need to paint this beautiful acrylic nature painting:
7 Steps to Painting a Tropical Sunset
Step One

The first step is just mixing our acrylic paint colors to assemble our palette.
Your colors don’t have to match mine perfectly, but you want a darker blue, a lighter blue, a pink, an orange, and a yellow.
These can all be mixed with the basic set of five colors for sale in my shop.
Step Two

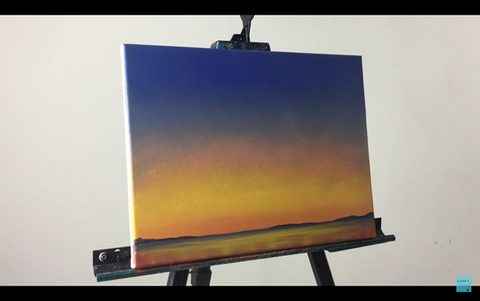
Keeping the brush damp, we will use our M1 blending brush to apply our colors to the canvas and make our background.
We won’t be blending the paints yet; we’re just laying them out in order.
Start with orange at the bottom and work your way up so that you’re going light-to-dark. Leave a little white space at the bottom of the canvas for water.
Clean your brush with water and dry it with a paper towel. Now we will blend.
Remember, I always say that when you’re wondering how to blend colors, think of applying makeup to your face: you want to use light swirling motions with the wrist. Work quickly, as the acrylic paints will dry fast.
Step Three

Now we’re going to paint water in that blank space.
Use your flat ½ brush and keep the brush nice and damp so that the paint goes on smoothly.
Add some of that dark ultramarine blue to the top of the blank space; that will be our horizon line.
Then grab a little of the pink we mixed and add some naphthol red to get a dark pink color and fill in the rest of the blank area below the dark blue with that color; this will be the reflection of the sunset in the water.
Add some light yellow to the middle of this dark pink section.
Finally, go back to your palette and grab some lighter blue.
Use that color to add a smoother transition between the dark pink and ultramarine blue.
We now have a beautiful ocean for our sunset painting.
Step Four
This step is all about adding highlights to bring out the depth in our acrylic painting.
Adding highlights and shadows is a crucial acrylic painting technique that will give it that extra touch of depth and realism.
With the same ½ flat brush, use light yellow to add some vertical sunlight reflections as well as horizontal ripples to the surface of the water.
Now mix some black with ultramarine blue to get a really dark blue and add some small distant mountains on the horizon.
Finally, go back with your round detail brush and delicately add some very small white highlights to the edges of the ripples to give them even more depth.
Step Five

The next step is probably my favorite: doing some acrylic cloud painting.
We’ll start back at our palette: mix your existing orange with some red and black to get a dark cherry red, and mix some more ultramarine with black to get a dark blue.
Again, these colors don’t have to be exact; it’s your painting so have fun with it!
Using our ½ flat brush, start with cherry red and add some small clouds near the horizon line.
Remember, the closer to the horizon, the more distant (and small) the clouds should be.
As you move upward into the sky, paint bigger and darker clouds using your dark blue.
Be free and creative with where you add the clouds; one of the best parts about painting clouds is that there’s no correct shape and you’re free to explore however you want!
Step Six

The next step in our tropical seascape painting will be adding the trees.
Grab a pure carbon black on your ½ flat brush and first add the tree trunks. Start up high and remember that they get thicker towards the base.
Leave a space between two of the tree trunks that we can use to tie our hammock between them 😉.
Now, use the same brush and color to add the palm leaves. Remember to keep the brush nice and damp so that it glides smoothly across the canvas.
There’s no one right way to paint the leaves; have fun with letting them hang any way you choose.
Step Seven

The final step in our tropical sunset is to add a little human touch.
You know I personally prefer painting landscapes over people, but this seascape looks so inviting that I couldn’t resist adding myself to the scenery 😜.
Use your flat brush to add a hammock in the gap between those two tree trunks, and lightly fill it in, leaving some open spaces to suggest transparency in the hammock’s fabric.
Now, switch to your #0 round detail brush and grab some orange. Use the orange to further emphasize the transparency of the hammock and define the outline of a person in there.
If you look at the photo, you’ll see that the top half of the hammock lets the sunlight through while the bottom half contains the person’s silhouette. As a final little extra detail (I love those!) add some orange to highlight where the hammock ropes are tied to the tree trunks.
All done!
I hope you had fun painting a tropical sunset escape with five simple acrylic colors in just seven steps!
Did you know it was that easy to create a stunning nature painting?
Be sure to check back on the blog weekly for more acrylic painting ideas for all skill levels.
Whether you’re a beginner or an expert, I encourage you to dive headfirst into all of my acrylic art tutorials.
You’ll learn how to blend colors with acrylic paint, as well as many other painting techniques. Or, you can just refine and practice your painting skills!
Be sure to subscribe to my newsletter so you don’t miss any new lessons on my blog or YouTube channel, as well as newsletter-only discounts on my products and future masterclass lessons.
And remember, you can buy all the products I used in this tutorial below:
Let me know if you enjoyed this written tutorial in the comments below, and stay tuned for more coming soon.
Until then, keep creating!
Many blessings,
Feliks K.
@colorbyfeliks