


How to Get A Smooth Blend Using Acrylic Paints
Hello ColorByFeliks Community!
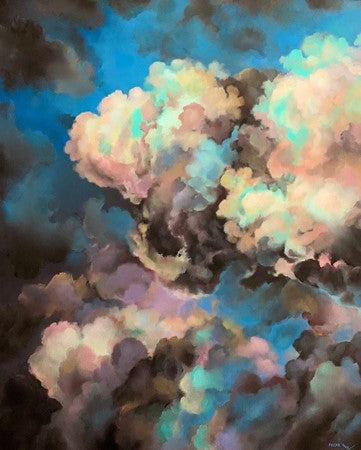
If you’re familiar with my work, you’ll know that I love color, and specifically using blending to create interesting gradients and combinations of colors. Whether I’m painting clouds, water, sunsets, or abstract works, I love using blends of color to make things pop in an unexpected way. My acrylic blending technique is something that I came up with on my own years ago, and has served me ever since. I’d love to use this week’s blog to go into the story behind my technique and show you how it could help take your acrylic paintings to the next level!
The core of the technique involves using a fluffy brush in a gentle, swirling motion. I had never seen this method before. Bob Ross, for example, uses an ‘x’ pattern with a 2-inch flat brush. While I love and respect the work of Ross and others, their techniques just weren’t quite giving me the result I saw in my head, which was a smooth, delicate blend. My other problem was that acrylics dry quickly, and this made it hard to get the same smoothness of blends that I saw oil painters achieving. I was a young adult living with my parents at the time, but I knew there had to be a way to blend acrylics the way I wanted to, so I resolved to figure it out.
I went to the store and got a huge variety of brushes to experiment with. After months of trial and error, I found a brush that got me closest to the vision in my head. There was no such brush designed for acrylics at the time, the one I found was meant for watercolors. Still, it got me a little closer to the blend I was after. I discovered that the best way to blend with this brush was by using a swirling method.

Even though I had the brush and the general motion, there were lots of variables left to dial in. I had to figure out the appropriate pressure, how much paint to use, and how to keep the paint wet so that it would blend in the first place. I also had to find the right quality canvas that would hold the paint the way I wanted it to (I will discuss canvases in a future blog). All these things took months and even years to perfect.
It’s like what I said in earlier blogs, though: persistence really is everything. There will be lots of frustration and lots of things along the way that seem like dead ends, but they are really just tests that will get you to that next level. I never had a clue how I would arrive at the perfect technique for my style; I simply had to figure it out step by step and through lots of mistakes. It all seems so clear in hindsight, but at the time, all you can do is keep experimenting for the next breakthrough.
I finally arrived at my technique at the age of 20 (I’m 31 now). Everything was dialed-in, but I was still using that watercolor brush, and I knew that was the one thing that still needed to change. My blending style is all about a light touch, but the synthetic bristles were just too rough to produce the delicate effect I wanted.

Years later, when we were able to invest into our first product, we knew exactly what we wanted to do: it was time to design our own ColorByFeliks blending brush.
We sought out a real hair brush to get away from the roughness of synthetic, and found that goat hair would be the best suited to my technique. We went through several manufacturers before finally finding one that produced the perfect brush which would also be cruelty free. After trying a few that weren’t quite there, I knew the second I touched the bristles that I’d found the one. When you’ve been painting for a long time, you become really familiar with texture and how it will hold paint and translate to the canvas. I was extremely excited; I was realizing a dream.
The brush is real goat hair and comes in three sizes. M1, the biggest, is for things like large canvases and background blends. M2 is great for clouds and other mid-size blending. M3, the smallest, is perfect for small details, adding in highlights, and contrast. Some people even use M3 for line work, depending on the scale of the painting you’re working on. A quick note: the brushes will shed: the goat hair is so soft that this is a natural part of the process and is to be expected the first few times you paint. We scoured the market for an alternative but this is just the nature of goat hair brushes.

The good news is that the shedding will stop after a few times, and that the brush actually gets better the more you use it! The bristles expand outward and get fluffier, resulting in even smoother, more organic blends. I’ve been using the same brushes for years and they just keep getting better, like a good pair of leather shoes. I made this brush because it’s the only blending brush I use almost everyday. I can’t wait for you to try it if you haven’t already. You can get the acrylic blending brushes here.
If you’re new to my content and are curious about my blending technique, I’ve released several videos that guide you through it step by step. You can find them here, here, and here. I’ve also released a free e-book on how to keep your acrylic paints wet, which you can find here.
Please let me know in the comments if you’ve tried my brushes in the past or are curious about them, or if you have any cool painting or blending techniques of your own. I love interacting with you all and learning from you.
Until next time,
Keep creating!
Feliks K.